
Routines
How to Patch Test a New Product Properly
Patch testing prevents skin disasters — but most people do it wrong. Here's the correct site, duration, and method for new skincare products.
Disclosure — This article may contain affiliate links. We earn a small commission at no extra cost to you when you purchase through our links. This supports our ability to create independent, evidence-based skincare content.
Patch testing is one of those things everyone says you should do and almost nobody does correctly. The advice is always the same: dab a bit on your inner arm, wait a day, proceed if nothing happens. That protocol is fine for a hand cream. For a retinoid or an active-heavy serum, it’s incomplete — and the gaps are where reactions happen.
This guide covers the actual mechanics: where to test, how long to wait, what you’re looking for, and how to tell a contact allergy from garden-variety irritation. Two different problems. Two different solutions.
Why Patch Testing Matters More Than You Think
Skin reactions to cosmetics are more common than the industry likes to advertise. A 2020 analysis published in Contact Dermatitis found that fragrance and preservatives account for the majority of cosmetic allergic reactions, but active ingredients — acids, vitamin C derivatives, retinoids — generate a significant share of irritant responses. The distinction matters because an allergic reaction means you’re done with that ingredient, potentially forever. Irritation might just mean you started too fast.
Skipping a patch test isn’t laziness — it’s a calculated risk most people take without realizing it. When the reaction happens on your full face, diagnosing the cause gets complicated fast, especially if you introduced multiple products at once. (Which is another reason to introduce products one at a time — see our guide on how to layer skincare for sequencing logic that makes troubleshooting easier.)
Patch testing gives you a controlled, reversible data point. A small inconvenience now versus a compromised barrier for three weeks. The math is obvious.
Where to Actually Patch Test
The inner arm is not always the best site. It’s convenient and low-stakes, which is why it’s the default recommendation — but arm skin is thicker than facial skin, better at tolerating irritants, and structurally different. A clean patch test on your forearm tells you something, but it doesn’t perfectly predict what will happen on your cheek.
The Two-Site Approach
For most products, test in two places simultaneously:
Inner forearm. Use this as your safety screen. If something causes a reaction here — redness, hives, blistering — stop immediately. You’ve caught a significant problem before it reached your face.
Behind the ear or along the jawline. Skin here is thinner and more representative of facial skin. This site catches reactions that wouldn’t show up on your arm. The neck, just below the hairline, is another good option — easy to ignore socially and close in skin profile to the face.
If the inner arm is clean but the jaw or neck site shows irritation, that’s useful information. It means the ingredient is tolerable in small amounts but may be problematic at full facial coverage.
A Note on Eyelid-Adjacent Products
Eye creams and anything you plan to use near the orbital area deserve extra caution. The skin there is the thinnest on the face. Test on the inner upper arm first, then on the side of the neck, and only bring it near the eye area if both come back clean after the full testing window.
How Long to Wait
One day is not enough. Here’s a more practical breakdown:
24 hours: Minimum threshold. Check for immediate irritant responses — burning, stinging, visible redness. If any of these appear within the first few hours, stop.
48–72 hours: The window for most delayed irritant contact reactions. This is when you’ll typically see redness, flaking, or dryness from acids, high-concentration vitamin C (L-ascorbic acid), and exfoliants.
96 hours (four days): The threshold recommended by dermatologists for identifying Type IV hypersensitivity reactions — what most people mean when they say a “delayed allergy.” These are mediated by T-cells, not antibodies, which is why they don’t show up immediately. The reaction typically peaks at 48–72 hours after exposure, but you need the full four days to catch stragglers.
The takeaway: don’t introduce a new product to your full face after one clean day on your arm. Give it four. Yes, this requires patience. It also requires not applying the test product for the entire window — reapplication extends the clock, which brings us to the next point.
Repeat Open Application Testing (ROAT)
A single application catches acute reactions. It doesn’t catch cumulative ones.
Repeat Open Application Testing — ROAT, in dermatology shorthand — involves applying a small amount of the product to the same test site twice daily for seven to fourteen days. This simulates real-world use and catches reactions that only develop with repeated exposure. Many preservative sensitivities and some fragrance reactions won’t appear from a single application.
Here’s the protocol:
- Choose your test site (inner forearm or behind the ear).
- Apply a rice-grain-sized amount to the same spot, twice daily.
- Do not wash the area between applications.
- Observe for redness, scaling, bumps, or itching at the test site — and watch for any spread beyond it.
- Run the test for seven days minimum, fourteen for products with a longer ingredient list or if you have a history of contact dermatitis.
ROAT is especially worth doing before introducing retinoids, strong exfoliants, or any product with a known sensitizer like a fragrance or certain preservatives. If you’re curious about reading ingredient lists before you start, our how to read skincare ingredient labels guide covers what to look for.
Irritation vs. Allergy: Not the Same Problem
This distinction gets collapsed into one category constantly. They’re different mechanisms with different implications.
Irritant Contact Dermatitis
This is a direct, dose-dependent response. The ingredient is damaging the skin faster than it can repair. It doesn’t require immune system involvement. Almost anyone will develop irritant contact dermatitis from a strong enough concentration of an acid or a solvent — it’s not about being “sensitive,” it’s about the chemistry hitting a threshold.
Signs: stinging, burning, dryness, flaking, redness that appears quickly (within minutes to hours) and resolves once you stop using the product.
What to do: reduce frequency, dilute with a moisturizer, or switch to a lower concentration. Irritant contact dermatitis does not mean you can never use the ingredient — it often means you started at too high a dose. Retinol is a good example. Most people experience some initial irritation; most of them can still use it if they buffer it and build up slowly. Our piece on retinol in winter and barrier maintenance gets into the specific mechanics.
Allergic Contact Dermatitis
This is an immune-mediated response. Your immune system has been sensitized to a specific molecule — usually a fragrance chemical, preservative, or sometimes a botanical extract — and now mounts a response every time it encounters it. Critically, sensitization develops with exposure; you can use something for months with no problem and then suddenly react.
Signs: itching more than burning, spreading redness that extends beyond the application site, hives, vesicles (tiny fluid-filled bumps). Symptoms may appear 12–96 hours after exposure.
What to do: stop the product permanently. With a true contact allergy, the reaction doesn’t improve with lower concentrations — the immune system will respond regardless. A patch test by a dermatologist (the kind with 30-odd standardized allergen patches applied to your back) can identify the specific molecule so you know what to avoid across all products.
One practical difference that helps distinguish them: if the reaction spreads well beyond where you applied the product, think allergy. If it stays confined to the application site, think irritation.
If you’re managing a compromised barrier, our guide on damaged skin barrier repair is worth reading alongside this one — a weakened barrier makes both types of reactions more likely.
What to Watch For During Testing
Beyond redness, there are a few specific things to note during a patch test:
- Stinging or burning on application: Expected with some actives (AHAs, high-concentration vitamin C). If it persists beyond 10–15 minutes or intensifies, remove the product.
- Itching: More associated with allergy than irritation. Take note.
- Follicular reaction: Small bumps clustered around hair follicles, distinct from general redness. This can suggest occlusion or, in some cases, a reaction to oils or emollients. Relevant if you’re testing oil-based products.
- Hyperpigmentation at the test site: Rare, but it happens with post-inflammatory pigmentation in deeper skin tones. If your skin tends toward PIH — see our PIE vs PIH explainer — this is worth monitoring.
If you’re testing a vitamin C oil or any multi-functional oil-based formula, the follicular reaction point is especially worth watching. Oil formats sit differently on skin than water-based serums.
A product like the Kerala Botanics Ayurvedic Vitamin C Face Oil — which combines a stabilized vitamin C derivative with bakuchiol — is a good candidate for ROAT precisely because it layers several actives in an oil base. For most people it’ll be fine, but if you have congestion-prone or acne-prone skin, the oil format warrants the full seven-day repeat application test before going full face. Worth it if the format fits your routine. Not ideal if heavy textures don’t agree with you.
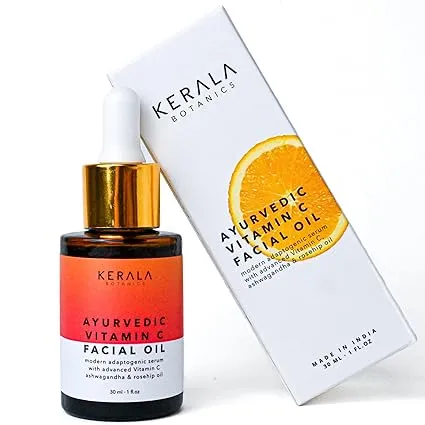
Ayurvedic Vitamin C Face Oil
Kerala Botanics
$49
★★★★☆
Common Mistakes That Invalidate a Patch Test
A few habits that undermine the whole exercise:
Testing on broken or recently irritated skin. A compromised barrier reacts more readily. Test only on skin that’s been stable for at least a week.
Using multiple new products simultaneously. If you react, you won’t know which one caused it. One new product at a time. This is tedious if you just bought five things, but it’s the only way to get clean information.
Moisturizing over the test site. Adding another product to the test area introduces variables. Leave the test site bare.
Washing the test area between applications. Removes the product before the skin has finished reacting. During ROAT, let it accumulate.
Calling it clean after 24 hours and going full face. Already covered, but worth repeating. Four days minimum for a single application, seven to fourteen for ROAT.
Putting It All Together
Patch testing done properly looks like this: two sites (inner forearm plus jaw or neck), twice-daily application for seven days minimum, observation for the full range of signs, and a clear distinction in your mind between the quick sting of an irritant and the creeping itch of an allergic response.
It takes a week. It’s not exciting. And it will, at some point, save your face from a week of raw, compromised skin because you didn’t wait.
If you’re building a new routine from scratch and trying to introduce products in a sensible order, our first skincare routine guide walks through what to add and when. For anything with actives — retinoids, exfoliants, high-potency vitamin C — the patch test protocol here applies before you commit.
The people who skip this step are always the ones describing a “mystery reaction” that’s been on their face for three weeks. Don’t be that person.